How to Create Approval Workflows

To save time and stay organized when it comes to approvals, consider setting up a workflow in Power Automate.  

To get started with approval workflows: 

  1. Sign into Power Automate 
  2. Select a template from the Templates tab or click Create to build a workflow from scratch. 

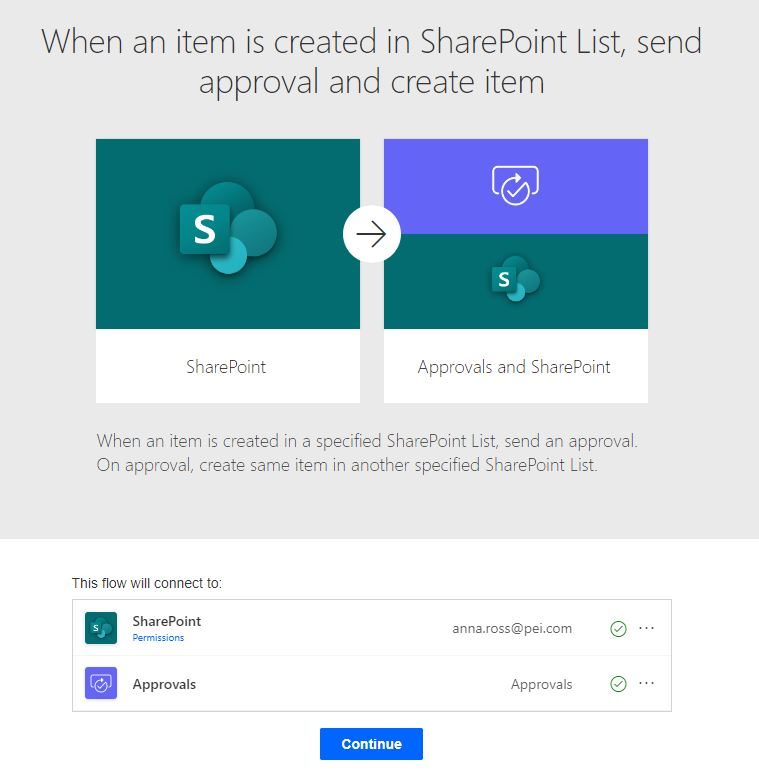
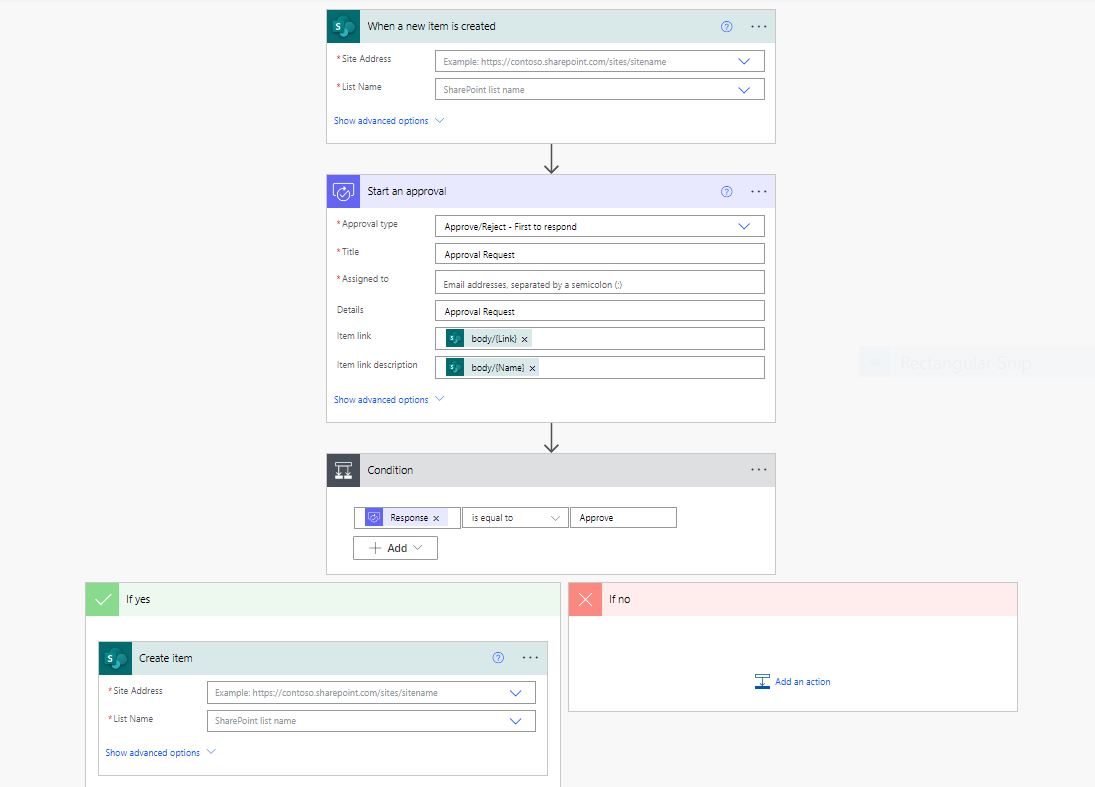
Note: for this example, we will use the workflow named “When an item is created in SharePoint List, send approval and create item” 

  1. If you are using an approval template, make sure the flow meets your needs (or can be expanded upon to do so) and click Continue. 
Preview your approval workflow if you choose to use a template.
  1. Fill out the details of your flow. For the example we are working through, fill out the SharePoint list and approver.  
Fill in the necessary details of your approval workflow.
  1. Once you have your details filled in, click Save. 

Interested in More Videos like this One?

Ask us about the QuickHelp platform, a self-paced e-learning portal that will change the way your users work—driving adoption, preserving IT resources, and increasing productivity and collaboration. QuickHelp delivers targeted and individualized content to keep users engaged and drive long-term change in your organization. Your users can take advantage of on-demand video content, live training classes, or PDF guides to learn the way that works best for them.

Discover Training that Works!

Leave a Reply